PersonalizerAI app requires a service account key to access Retail AI API on your Google Cloud Project. This guide walks you through creating a service account in your Google Cloud Project and getting a service account key file to upload to PersonalizerAI app.
A service account as a JSON file is required to authenticate PersonalizerAI to use Retail AI. To create a service account, follow the steps below:
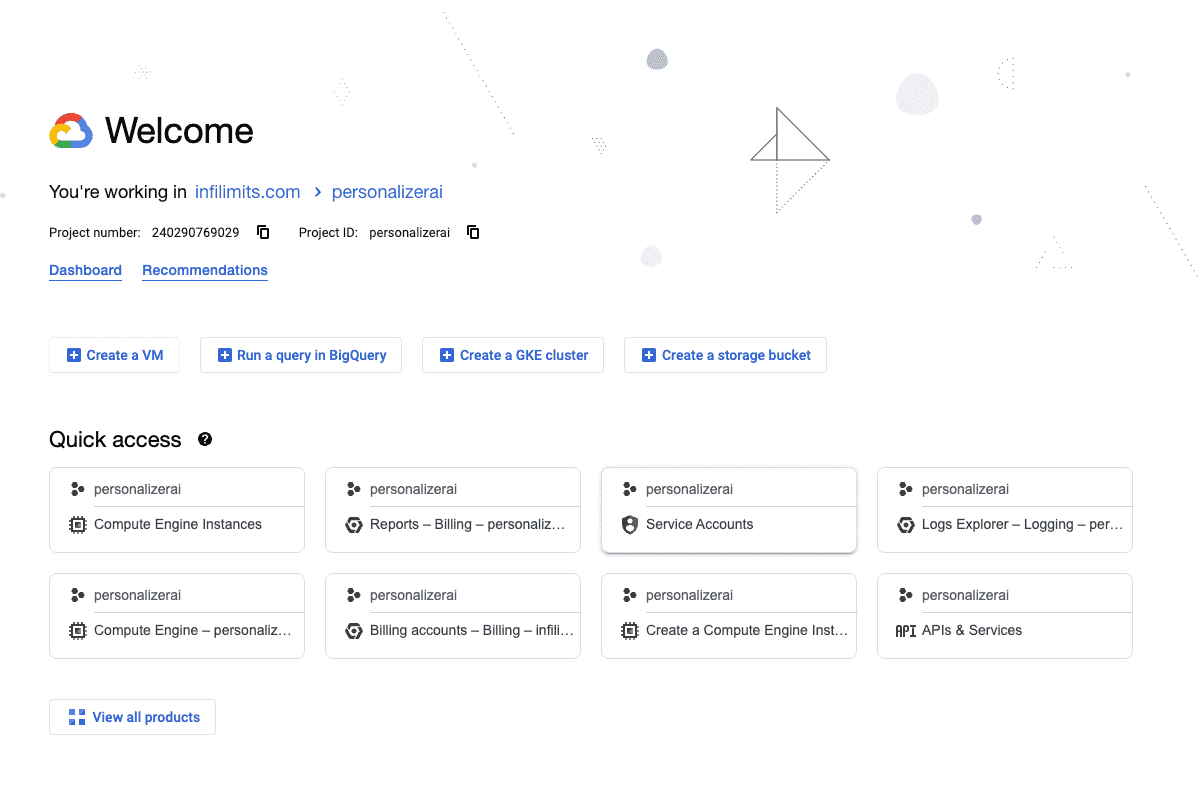
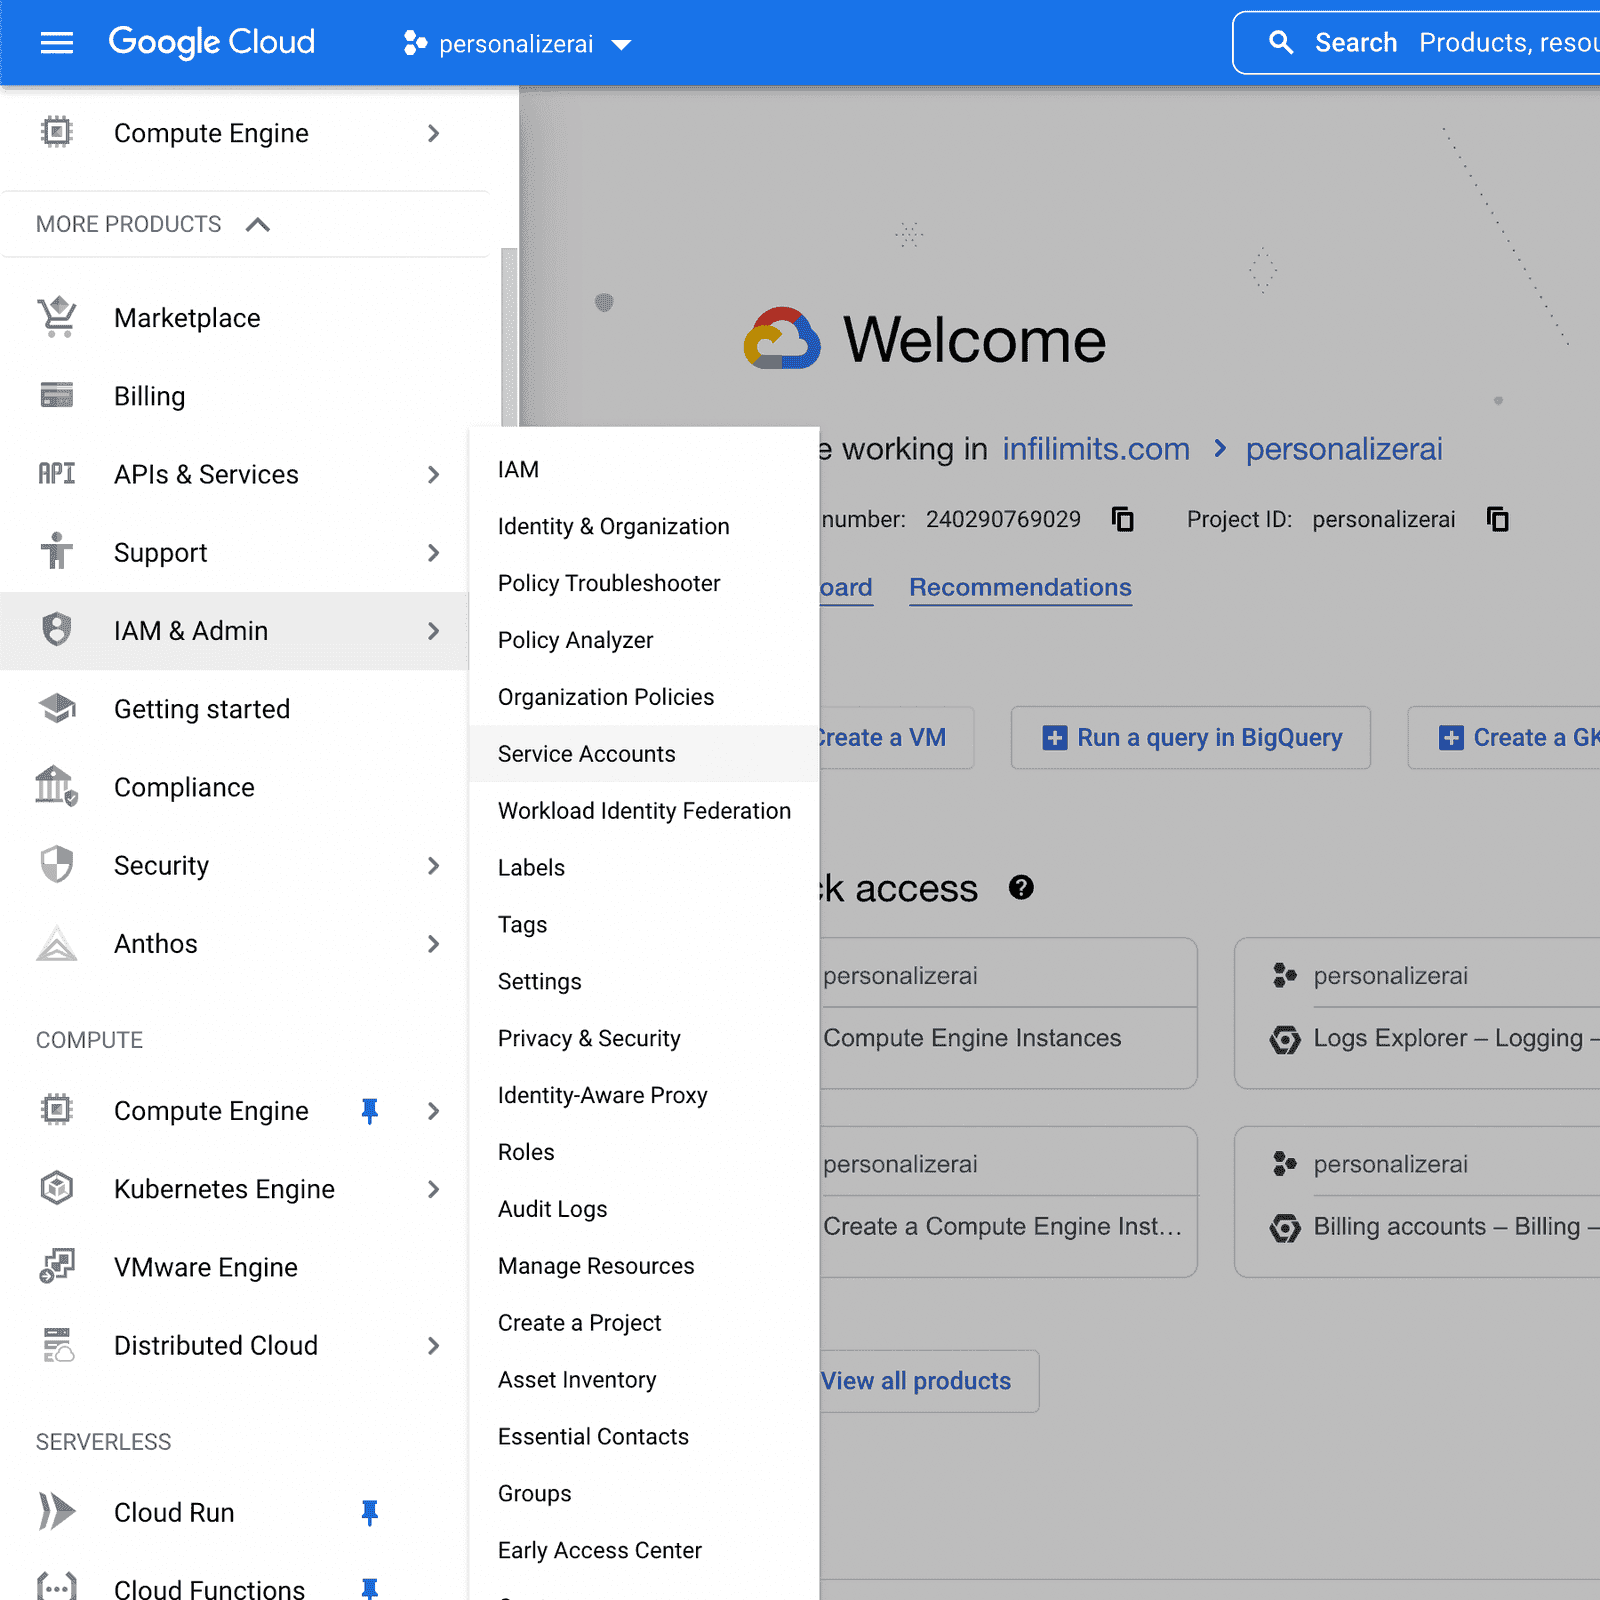
1. Log in to your Google Cloud Console and click on the hamburger icon at the top left corner.
2. Hover on IAM & Admin > then click on Service Accounts .
Select an Image
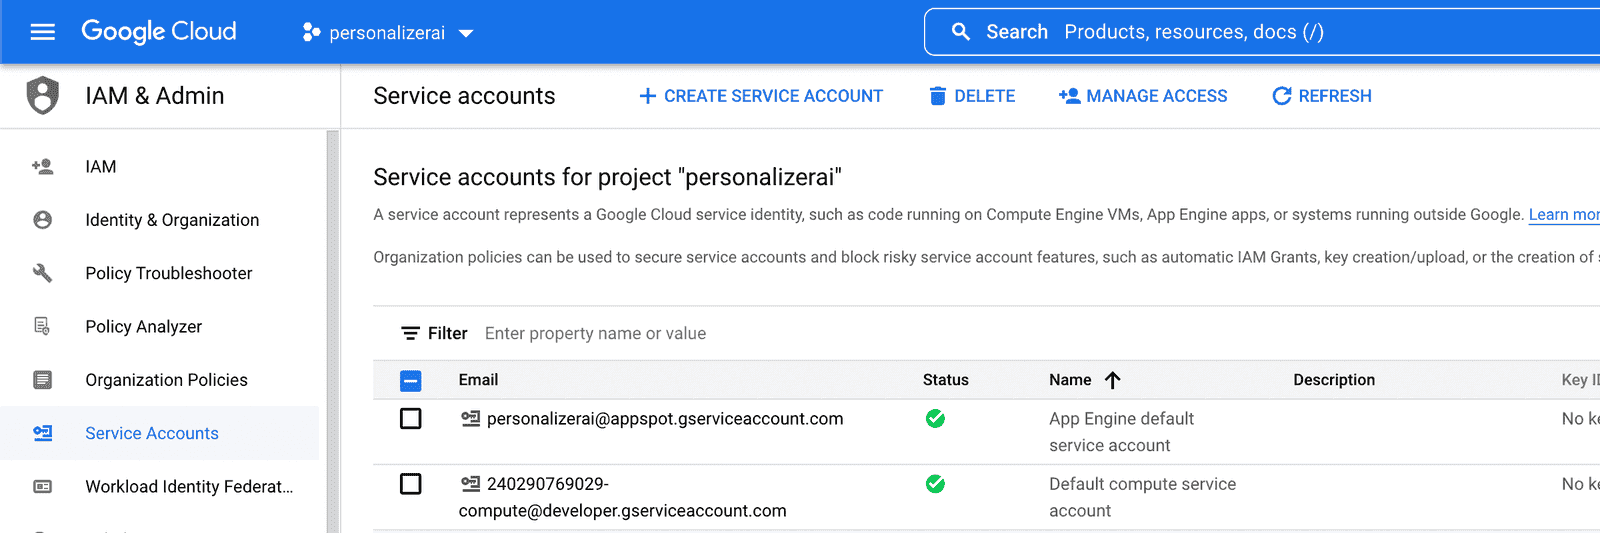
3. Click on + CREATE SERVICE ACCOUNT .
Select an Image
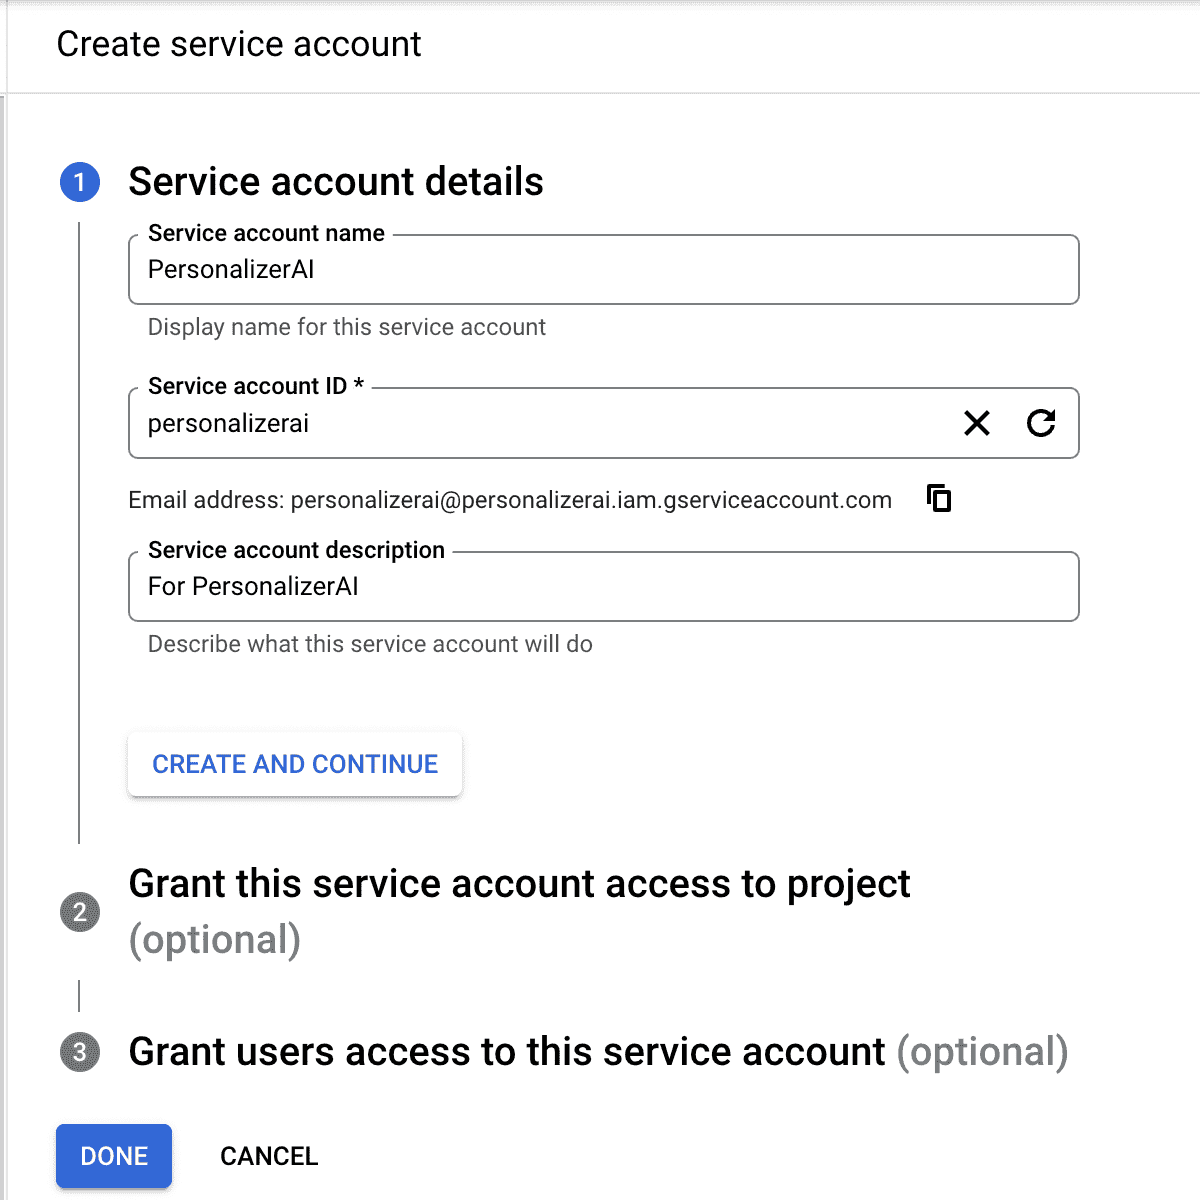
4. Provide Service account details including the account Service account name, Service account ID, and Service account description. Click CREATE AND CONTINUE .
Select an Image
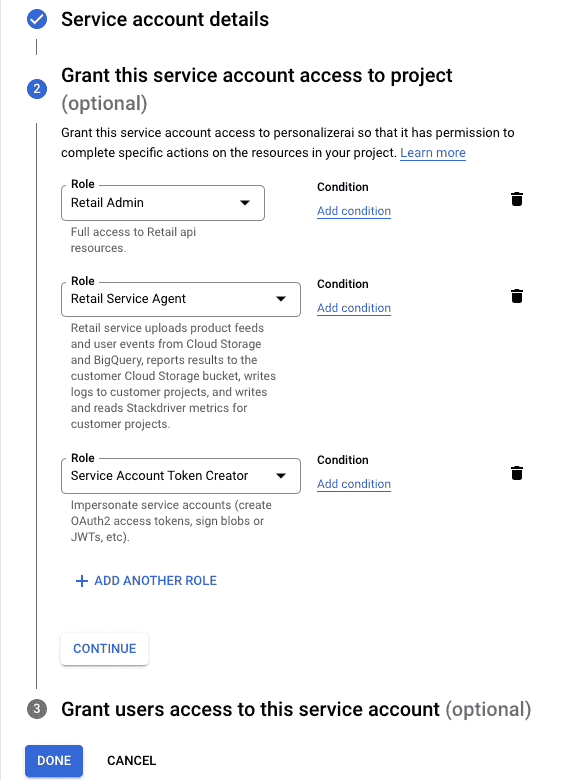
5. In the Grant this service account access to project step, grant these roles:- Retail Admin- Retail Service Agent- Service Account Token Creator
Select an Image
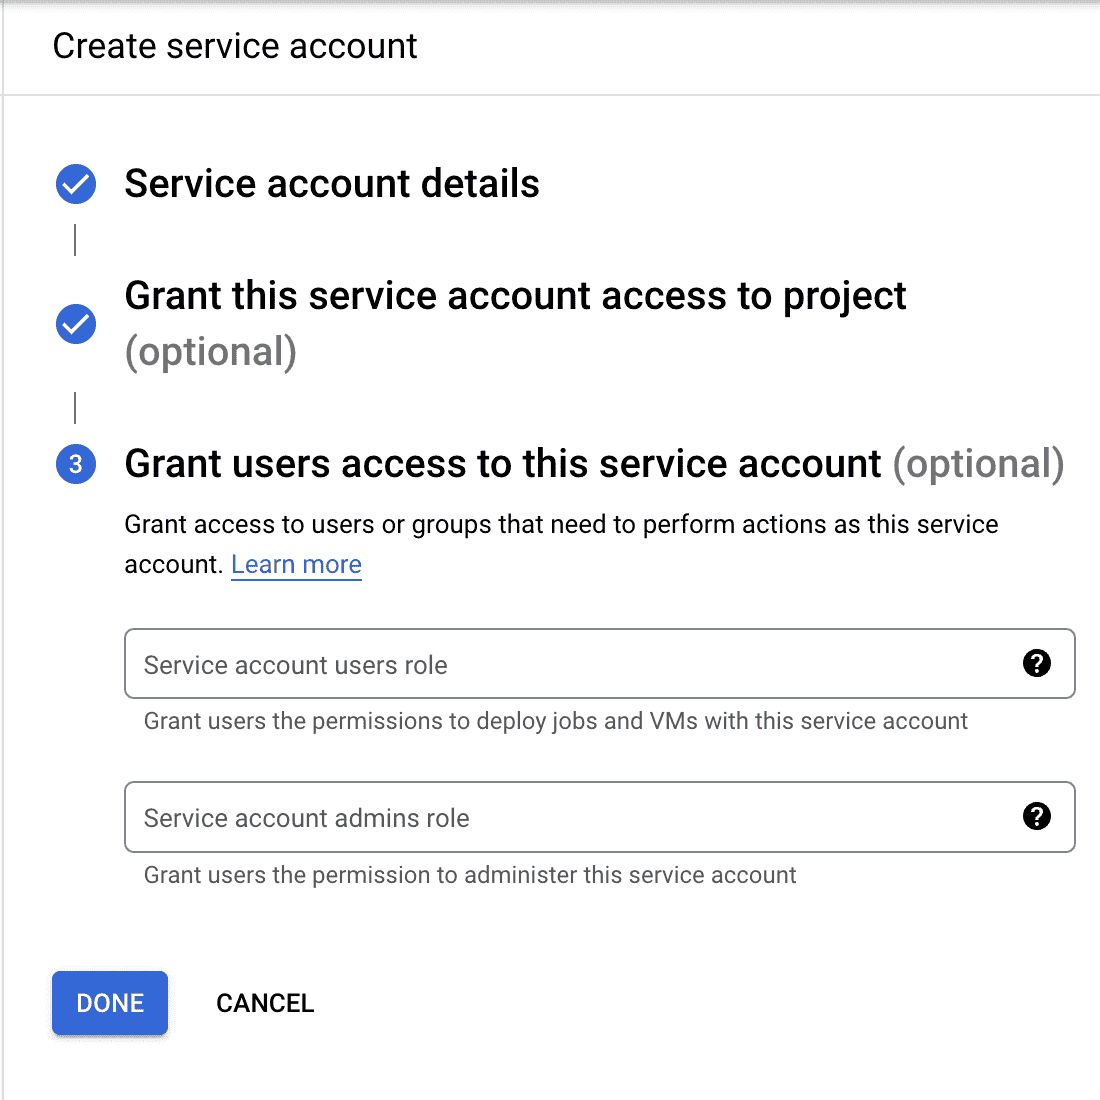
6. You can leave the Grant users access to this service account step as is. And click on Done .
Select an Image
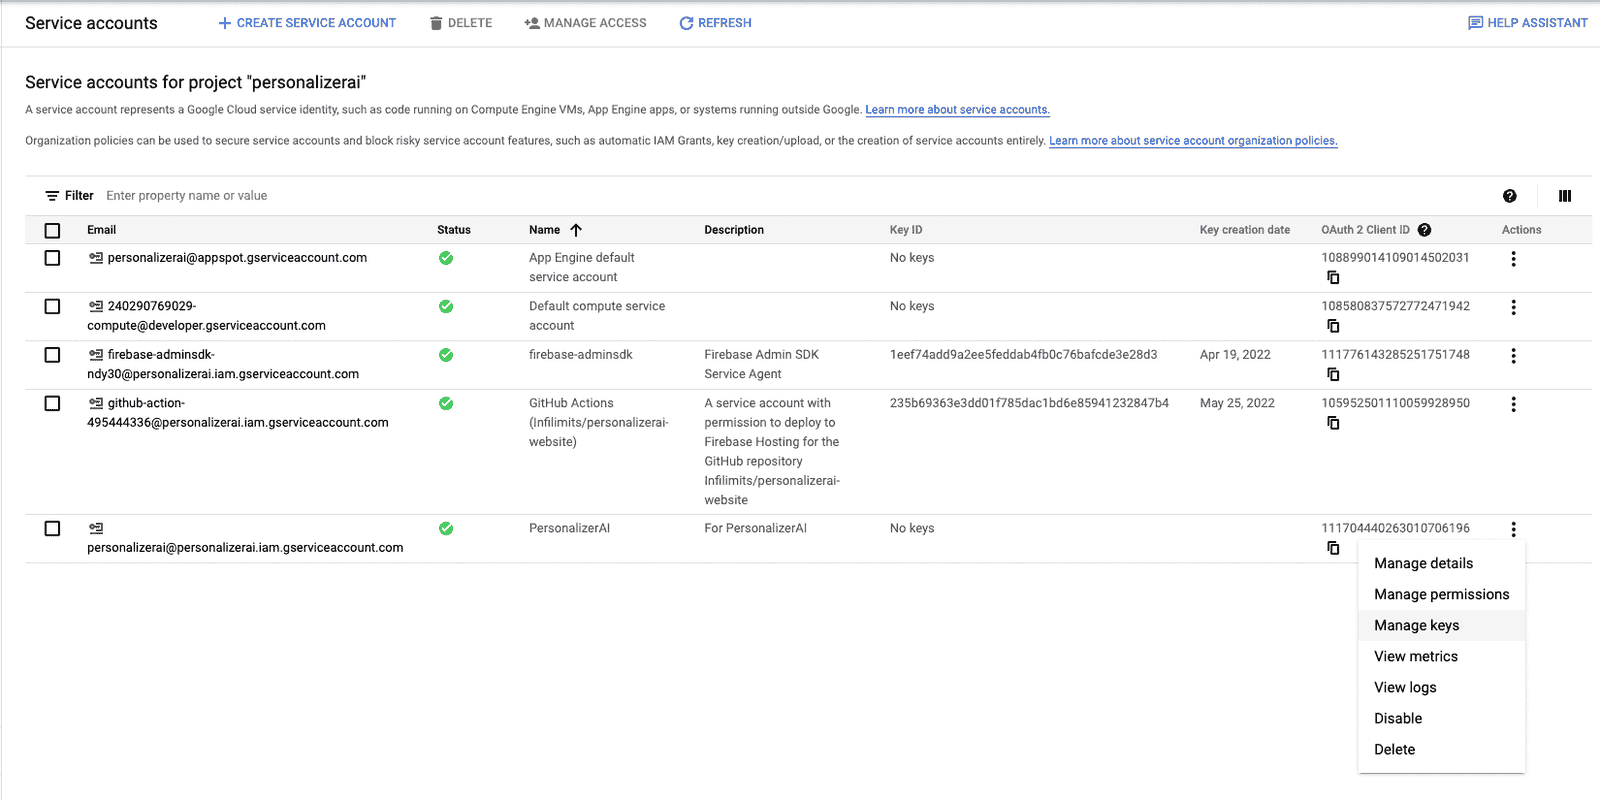
7. After that you will be redirected back to the Service accounts page. Here you need to click on the 3 vertical dots in the Actions columns and select Manage keys .
Select an Image
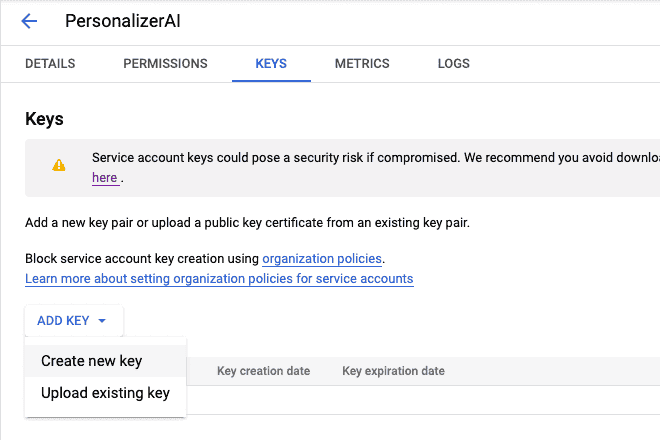
8. Now on the Keys page click on ADD KEY , then .